What if a simple loom could turn leftover yarn into something you’d actually use every day?
Easy loom weaving projects are the perfect way to make beautiful, tactile pieces at home-without needing advanced skills, expensive tools, or a dedicated studio.
From coasters and wall hangings to scarves, mug rugs, and small woven bags, these beginner-friendly ideas help you learn the basics while creating finished pieces with real charm.
Whether you’re using a frame loom, lap loom, or cardboard loom, you’ll find projects that are relaxing, practical, and satisfying from the very first row.
Beginner Loom Weaving Basics: Tools, Yarn, and Simple Project Ideas
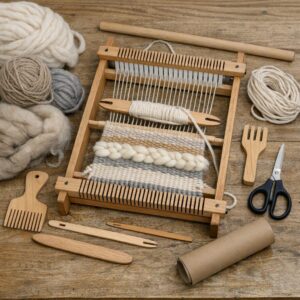
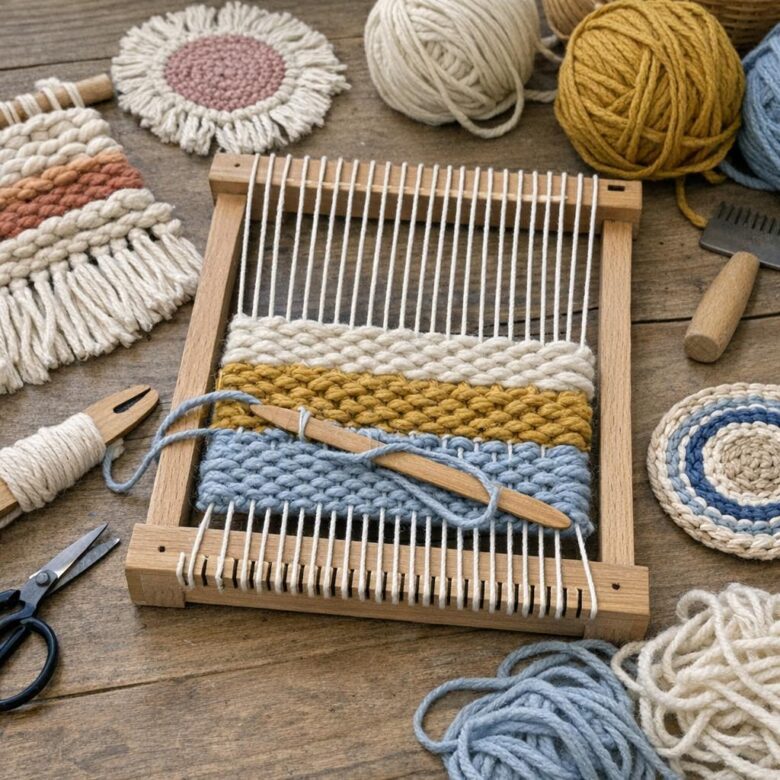
For easy loom weaving at home, start with a small frame loom rather than an expensive floor loom. A beginner weaving loom kit usually includes the loom, shuttle, shed stick, weaving needle, and comb, which keeps the upfront cost manageable and helps you learn the process without buying separate weaving tools.
Choose yarn based on the project, not just the color. Cotton yarn works well for coasters and table mats because it holds its shape, while wool or acrylic yarn is better for wall hangings with soft texture. In practice, I’ve found that beginners get cleaner edges when they use medium-weight yarn instead of very thin fibers.
- Clover weaving needles are handy for small frame loom projects.
- A wooden comb or tapestry beater helps pack each row evenly.
- Warp thread should be strong cotton, not stretchy knitting yarn.
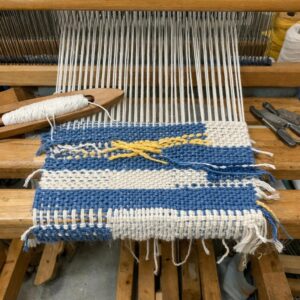
A simple first project is a woven coaster set: warp a small loom, weave plain rows with cotton yarn, then finish the ends with tight knots. This teaches spacing, tension, and finishing without taking days to complete. It also makes a practical handmade gift.
If you want to compare supplies, check prices for loom weaving kits on craft stores or platforms like Etsy, especially if you want handmade looms or specialty yarn bundles. Look for kits that include clear instructions, replacement warp thread, and basic finishing tools, since those small extras can save money and frustration later.
Step-by-Step Easy Loom Weaving Projects to Make at Home
Start with a small frame loom or lap weaving loom, especially if you are working at a kitchen table or desk. A basic loom weaving kit, cotton warp thread, chunky yarn, a tapestry needle, and a weaving comb are enough for most beginner projects, and brands like Clover make reliable tools that last beyond one craft session.
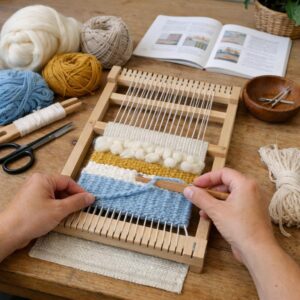
For a simple woven wall hanging, warp the loom tightly from top to bottom, then weave yarn over and under each thread. Use a fork or comb to push each row down evenly, and switch yarn colors every few rows for stripes, blocks, or a soft ombré effect.
- Mini wall hanging: Use wool roving, cotton yarn, or recycled fabric strips for affordable home decor.
- Coaster set: Choose cotton yarn because it handles moisture better and lies flatter on a table.
- Small table mat: Keep the edges straight by not pulling the weft yarn too tightly.
A real-world tip: beginner weavers often make the sides curve inward because they tug the yarn at each turn. Leave a small loop at the edge before beating the row down; it gives the fiber room to settle and makes the finished piece look cleaner.
Once the weaving is finished, cut the warp threads, tie them in pairs, and trim the fringe evenly. If you want to sell handmade crafts on Etsy or make gifts, photograph the piece in natural light and list the material cost, size, and care instructions clearly.
Common Loom Weaving Mistakes and How to Improve Your Finished Pieces
One of the most common loom weaving mistakes is uneven warp tension. If some warp threads are tighter than others, your finished wall hanging, coaster, or table runner may pull to one side, even if the pattern looked fine while weaving.
Before you start, press each warp thread gently with your finger and adjust loose areas. A beginner weaving loom or adjustable frame loom should feel firm but not guitar-string tight; too much tension can make edges curl and yarn harder to pack down.
- Wavy edges: Use a cardboard spacer or leave a little slack when turning the weft at each side.
- Loose rows: Beat the yarn evenly with a weaving comb instead of pushing hard in random spots.
- Bulky knots: Weave yarn tails into the back rather than tying visible knots.
A real-world example: if you are making woven coasters with cotton yarn, tight edges can shrink the sides and turn a square into a trapezoid. Leaving a small loop at the edge before beating the row helps the coaster stay flat and professional-looking.
Finishing matters as much as weaving. After removing the piece from the loom, secure the warp ends, trim uneven fringe, and use blocking mats or a light steam from an iron to shape the fabric; this is a simple upgrade that makes handmade home decor look cleaner.
If you plan to sell finished pieces on Etsy, consistent sizing, neat backs, and durable yarn choices matter more than complicated patterns. Investing in good loom weaving supplies, such as a quality tapestry needle, cotton warp thread, and a reliable weaving comb, can improve results without dramatically increasing your project cost.
Wrapping Up: Easy Loom Weaving Projects You Can Make at Home Insights
Starting with simple loom weaving projects is the best way to build confidence while creating pieces you can actually use or display. Choose a project based on the time you have, the yarn you enjoy handling, and how much finishing work you want to do.
- For quick wins: make coasters, bookmarks, or small wall hangings.
- For skill growth: try patterns with texture, color changes, or fringe.
- For practical results: focus on placemats, pouches, or home decor.
Keep the first project manageable, then let each finished piece guide your next creative step.

Dr. Ethan Carver is a creative arts specialist focused on helping makers turn simple materials into practical, beautiful handmade projects. Through WeaversRock Crafts, he shares clear DIY tutorials, craft ideas, home décor inspiration, and beginner-friendly techniques for creative living.